Showing posts with label cupcakes. Show all posts

Friday, December 28, 2012

Xmas Feast

Sharing what my family and I had for Xmas :)

My church Xmas celebration was on Sunday 23 Dec, and we went to Legoland Malaysia on Monday 24 Dec, so we had our Xmas meal on Xmas day itself, 25 Dec

I was busy in the kitchen the whole day cooking and baking on that day, despite feeling tired after the long day we spent in Legoland
As a result, I felt really tired for the next two days I didn't feel like doing anything, hence the late post cos I uploaded all the pictures only yesterday :)

So, here's what we had for our Xmas lunch...
Lemon maple honey baked ham with roasted vegetables, cream corn soup (cooked by my mum) and aglio olio spaghetti


The ham and vegetables before going into the oven

After out from the oven
 
 
I got the recipe from my sis' friend whom owns a restaurant, he's a great chef and I thank him for sharing this great recipe. This was the third time I used this recipe :)
Sorry but he didn't give the exact measurement of the ingredients used, and I never really measured myself everytime I made this...
 
What you need:
 
800g honey baked ham
salt / pepper
 
For glazing:
sweet dark soya sauce
worchestershire sauce
honey
lemon
maple syrup
salt / pepper
 
Vegetables I used roasted together with the ham: (cut in chunks)
Japanese pumpkin
baby potatoes
Australian baby carrots
green and red capsicums
  1. Slice ham crosswise, marinade with salt and pepper, set aside for around 1 hour
  2. In a bowl, mix all ingredients for glazing.
  3. Arrange all cut vegetables in an oven proof baking dish. Sprinkle a little salt and black pepper also drizzle with a little oil
  4. Brush ham all over with the glaze, and place in the middle of the baking dish on top of vegetables and bake in preheated oven of 220degC for approximately 1 hour
  5. Turn ham to the other side halfway
 
And here's our dinner...
Still with the same roasted vegetables but this time it's roasted chicken :)
 

Before going into the oven


I used the recipe I saw at Annie's site
I like the name, I like how easy to prepare this dish and I like the good review she wrote
And so I chose this recipe, and what a good choice it was!
 
I skipped the pan-searing step, which I totally regretted. You see how my chicken looked like and you see hers and you know that this step is not to be skipped!
The next time I make this again, I will surely take the trouble to go through this additional step
 
Taste wise, it's really really good! Just like what she described - crisp skin, juicy and succulent meat
It's so good that there's no leftover on that night, all gone! :)
 
I marinated the bird for approximately 10 hours, from early morning to dinner time
The next time I make this again, I will marinade overnight
 
oh ya, I didn't tie the end of the leg to join them together since no stuffing for the chicken
 
Here's the recipe, thks Annie for sharing :)
 
What you need:
(I made 1.5 recipe for the seasoning)
 
1 whole chicken (I used free range / kampong chicken)
4 tbsp olive oil
15g sea salt
few dashes of pepper
1 tsp of dried rosemary (or fresh rosemary)
  1. Clean the chicken, cut the feet, neck and tailbone. Wash and pat dry with kitchen towel
  2. Mix well in a small bowl: oil, salt, pepper, rosemary and roast chicken seasoning
  3. Spread the marinade mixture all over the chicken, including underneath the breast skin, too
  4. Keep the chicken in the fridge overnight (in an airtight container or wrapped in cling wrap)
  5. Preheat oven to 220degC with fan on, top and bottom heat
  6. Pan sear the chicken for 1 minute each side, let it slightly browned
  7. Cut the vegetables in chunks, place it in the oven proof baking dish, drizzle with oil and sprinkle with some salt and pepper
  8. Place the chicken in the middle on top of the vegetables
  9. Put the baking dish into the oven and bake for 40 minutes
  10. Reduce heat to 190degC and further bake for 20 minutes
 
Did you see the browned skin on top? It's because I was itchy hand when I saw the bird was not brown enough to my liking, I switched the oven to grill mode at the last few minutes. I ended up having the slightly charred skin :(
But actually, it tasted yum, crisp and brown LOL
Not recommended though, it didn't do the appearance any good hehehe...
 
 
Now, the last thing I did on Xmas day... one bowl chocolate cupcakes from Martha Stewart
 
 
Very easy to prepare with a pretty good result :)
And I decorated some of the cupcakes into this...
 
 
The Xmas tree cupcake, too bad I didn't have anything to make a yellow star to put at the top of the tree...

 
The Xmas wreath

 
And not to forget, Mr Snowman :)
 
 
Here's the recipe for the cupcakes...
 
What you need:
 
3/4 cup unsweetened cocoa powder
1 1/2 cup plain flour
1 1/4 cup sugar
1 1/2 tsp baking soda
3/4 tsp baking powder
3/4 tsp salt
2 large eggs
3/4 cup warm water
3/4 cup buttermilk
3 tbsp canola oil
1 tsp vanilla extract
  1. Preheat oven to 175degC
  2. Line muffin pan with paper liners, set aside (I got 12 mini and 10 standard cupcakes)
  3. Sift together cocoa, flour, sugar, baking soda, baking powder and salt in a large bowl
  4. Add in eggs, warm water, buttermilk, oil, vanilla and mix til smooth, about 3 minutes with balloon whisk. Scrape the bottom and sides with rubber spatula to assure the batter is well mixed
  5. Pour the batter into the muffin cups, 2/3 full
  6. Bake til the tops spring back when touched and skewer comes out clean, mini cupcakes about 15 minutes, and standard cupcakes about 25 minutes, rotating pan if needed
  7. Transfer to a wire rack, cool completely
 
Okay, so that's about all what I did on Xmas day
What a fun we had on that day, and of course - stuffed! LOL
Really hope you had a great Xmas too! :)
 
The snowman was chosen by Ian and candy cane was Abby's choice - both from Daiso :)


Friday, August 31, 2012

Healthier Chocolate Cupcakes (Happy Call) For Teacher's Day Gifts & Healthy Baked Sweet Potato Fries

No eggs, no butter, less sugar
A healthier choice for this sweet fudgy rich moist soft chocolate cake
I baked this using Happy Call, the result is similar to steamed cake
I guess baking with oven will give fluffier texture


I was worried the cake would rise too high so I poured only half the mould hence the short cupcakes :)

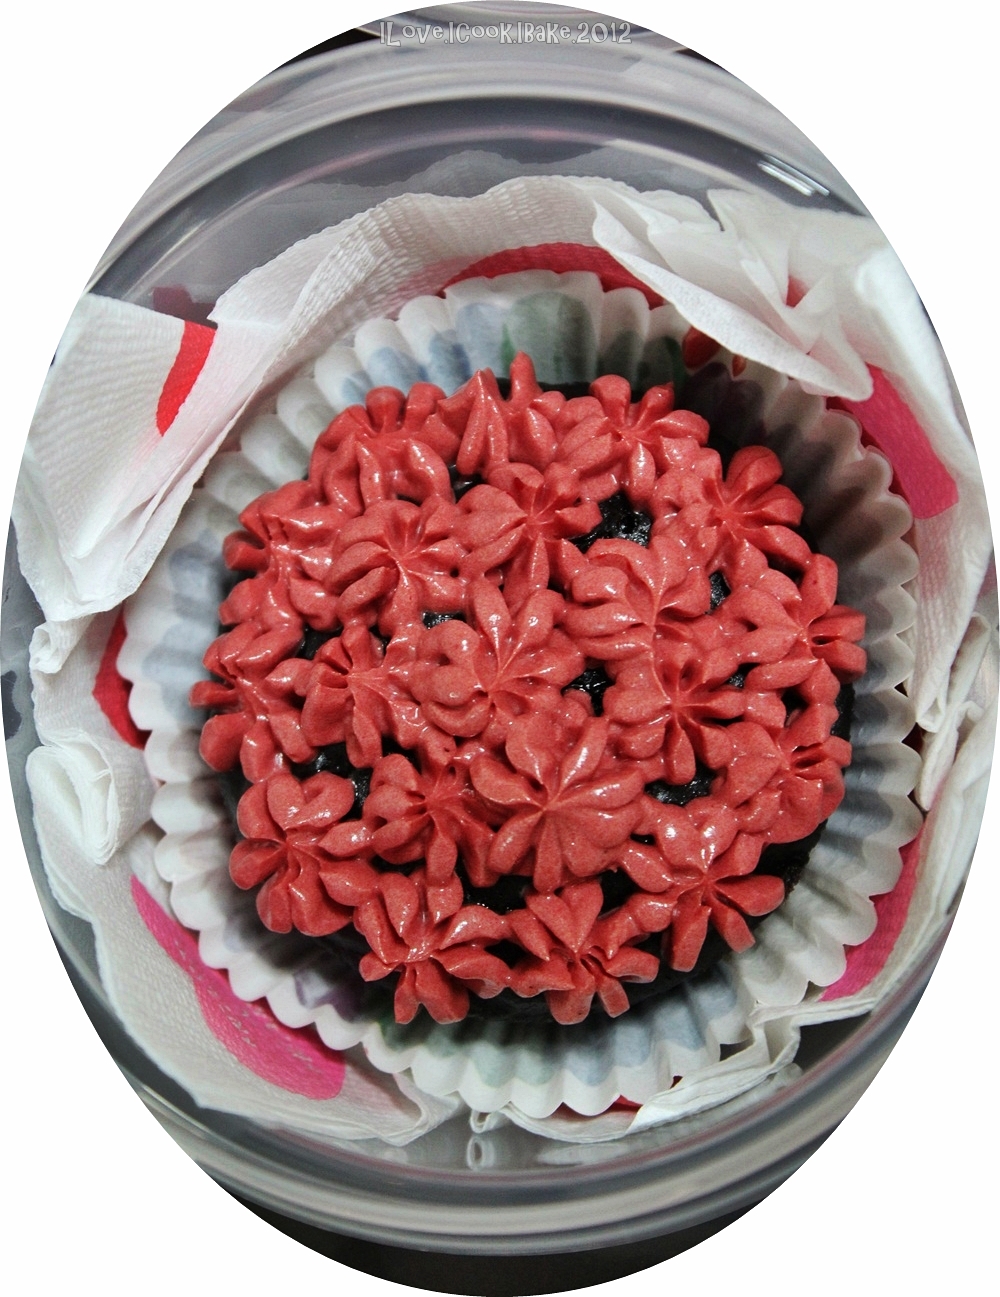
I decorated some of them for Teacher's Day gifts for my kids


I bought the container which can be of a use, and decorated the cover with self made ribbon, hence the decent shape :)

Recipe is from Passionate About Baking

What you need:

180g all purpose flour
130g sugar (reduced by 30% and it's just nice for me)
30g unsweetened cocoa powder
1 tsp baking soda
1/2 tsp salt
1 cup hot water
90ml canola oil
1 tbsp distilled white vinegar
1/2 tbsp vanilla extract
  1. Sift together flour, sugar, cocoa, baking soda, salt
  2. Combine water, oil, vinegar, vanilla in a large cup
  3. Add to the dry ingredients and whisk just until combined, a few lumps are ok
  4. Oil cups, pour batter half the cup
  5. Pour two mugs of water into Happy Call pan, bake small flame til tester skewer comes out clean, around 30 minutes
  6. If baking in the oven, it'll about 30 minutes at 180degC
  7. Let cool on a wire rack and decorate as desired (to eat plain is good enough to me)
I will surely try the baked version next time, this is one yummy chocolate cake recipe :)


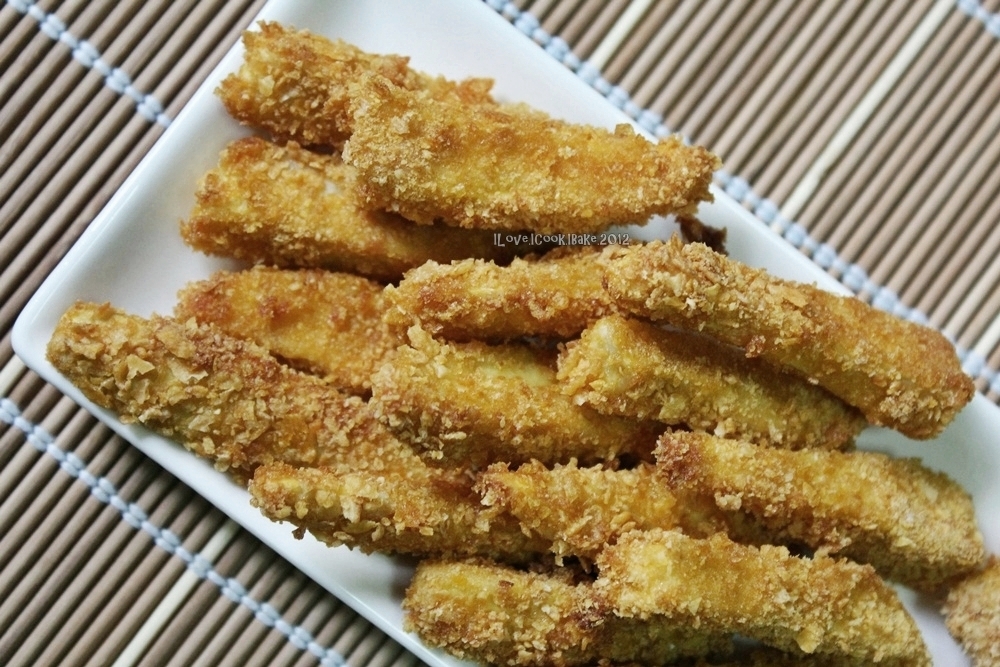
Another healthy snack I'd like to share with you is baked sweet potato fries
Simple to prepare and yummy too
A sweet good quality sweet potato determines the end result
I used Indonesian honey sweet potatoes and it's sweet in taste

I had a little leftover blended wholemeal bread so I used it as coating and the remaining used crushed cornflakes - they're healthier options than ready to use store bought panko breadcrumbs


With wholemeal breadcrumbs coating


With crushed cornflakes coating


Left: wholemeal breadcrumbs coating. Right: crushed cornflakes coating


Both are nice, but I personally prefer the one with cornflakes coating, the contrast of salty and sweet is really great together

Recipe is from Seasaltwithfood

What you need:

2 medium size sweet potatoes, peeled and cut like french fries
1 egg, beaten
2 tbsp all purpose flour
1/2 tsp salt
1/2 cup wholemeal breadcrumbs / crushed cornflakes
  1. Toss sweet potatoes with flour mixture, dip in egg, coat with breadcrumbs
  2. Place on baking tray, lightly spray with canola oil
  3. Bake on preheated oven of 220degC for 15-20 minutes

Original recipe used cayenne pepper, but it's too hot for the kids, so I didn't use
This snack is best eaten fresh from the oven
After an hour or two, it somehow lost its crispiness
You may toast them for 2 to 3 minutes to bring the crispiness back

I'm submitting both the cupcakes and baked sweet potato fries to  Aspiring Bakers #22: Lightened Up Cakes (August 2012) hosted by Qi Ting of A Dessert Diet

Monday, August 27, 2012

Emergency Blender Chocolate Cupcakes & Two Years Blog Anniversary

I have been really interested in trying this recipe, it's really a good decision
So easy to make, and it turned out to be a moist and tasted really good

One mistake I did, I only took pictures the day after, taken out from the fridge, the chocolate frosting was wet with condensation and I dabbed it with tissue paper, hence the pattern on top LOL

I made one recipe, and out of curiousity, I baked half with muffin tray, and steamed half with 20cm round pan
The result was totally different

The baked ones tasted like soft, quite fluffy and moist cake


The steamed one tasted more like a dense, rich, chocolaty yet soft pudding cake


I and my brother prefer the baked one, and the kids, too. DH and my sister, also my mum love the steamed one
So, it's good. Everybody gets a fair share :)

Recipe is from the book The Weekend Baker by Abigail Johnson Dodge

What you need:
(I reduced the sugar by 1/4 cup)

1 cup all purpose flour
1/2 cup cocoa powder
3/4 cup sugar
1/2 tsp baking soda
1/4 tsp salt
3/4 cup hot water
1/2 cup canola oil
1 large egg
1 1/2 tsp vanilla extract
  1. Preheat oven to 190 degC
  2. Line muffin tray with cupcake liners
  3. Mix flour, cocoa powder, baking soda, and salt in a blender. Blend on medium speed covered
  4. Add in water, oil, egg and vanilla. Cover and blenf on medium high speed til smooth and well belnded, stopping once or twice to scrape down the sides
  5. Pour into muffin cups 2/3 high, bake on medium rack for 20 minutes or til tester skewer comes out clean, let cool
  6. (For steaming, preheat steamer and pour batter in a lined round pan and steam over medium heat for 45 minutes til tester skewer comes out clean, let cool)
Fudgy frosting:
(I reduced the sweetener quite a bit cos I used semi sweet chocolate instead)
8 oz semi sweet chocolate chips
8tbsp unsalted butter
1/8 cup light corn syrup
3tbsp condensed milk
1 tsp vanilla extract
pinch of salt
  1. Melt together chocolate chips and unsalted butter (double boiled or in microwave)
  2. Add in condensed milk, corn syrup, vanilla and salt. Whisk til well blended. It will thicken as it cools
  3. After completely cooled, cover with plastic wrap til ready to use
When the cake is completely cooled, spread a dollop of the frosting on top

Btw, today is my second blog anniversary! :)

(pic courtesy of spicytunas.com)


Time flies, really!
So far, I am still so glad that I started blogging two years back, one of the best decision I ever made!
I got to know many new friends with the same passion, got to experience cooking and baking things I never thought I would do too!
Blogging has become one of my hobby and I'm still hooked til now, more than ever!

I'm a self taught cook and baker at home which never attended even one cooking and/or baking class, blogging has given me priceless knowledge for me to improve even more :)
Not only that, I (try) to pick up skills in taking snaps of my food by looking at georgeous pictures I always find in all blogs
I learnt too that even though the subject is our passion - food, but basically blogging brings out our very own character in our writing, which I enjoy very much
And for those things, many thanks to you all, my dearest friends :)

This time, I have some giveaways to share my joy for blogging
I will reveal in my post tomorrow okie... Need to zzzz now, it's 12.30am now :)
Good night!

Friday, December 16, 2011

Tuti Frutti Orange Tres Leches Cupcakes With Orange Choco Ganache

The cake is the same as fruity orange cupcakes from my previous posting, but for this cake, just see the name...Tres Leches Cake... yes, it's three milk cake... something new to me

Pouring each cupcake with mixture of three types of milk: sweet condensed milk, evaporated milk and thickened cream, leave it overnight in the fridge, and the next day you'll get an intensely super rich and moist cupcakes
Best to partner this kind of cake with something refreshing...what else if not fruits to balance the richness from the milk absorbed by the cake


What I used for the milk mixture: (stir well)
(this is half from the original recipe and I find it's sufficient)
You may change the type of milk as desired, example: low fat milk, soya milk, coconut milk, etc.

350ml evaporated milk
350ml sweet condensed milk
60ml thickened cream

I''ve submitted this cake to LBT event this month with the theme of Tres Leches Cake

Warning!
It's not suitable for those in diet, this cake is seriously high in calorie, you can feel it in every bite! :)

Wednesday, December 14, 2011

Fruity Orange Cupcakes With Orange Choco Ganache

I feel that this refreshing spongy cupcakes can be a great treat with a cup of tea on a Christmas afternoon with friends and family :)

Chocolates and oranges work really well together, Abby loves it, we all do :)
Especially when it's an oh so rich orange with dark chocolate ganache on soft pillowy orange cupcake, not to mention the mouthwatering fresh fruits on top


What you need:

140g cake flour
1 1/2 tsp baking powder
1/4 tsp salt
5 eggs, separate the yolks from the whites
180g caster sugar (divide 140g and 40g)
1 tsp vanilla essence
1 tbsp orange zest
40ml orange juice
40ml fresh milk

Orange choco ganache:
450ml orange juice
160g dark chocolate

For deco:
canned oranges
fresh cranberries
fresh kiwis

Preheat oven to 180deg, line cupcake pans with muffin liners, set aside
Sieve flour, baking powder and salt, set aside
Beat egg yolks and 140g sugar on high speed til thick and pale
Add in fresh milk, orange juice and vanilla essence, beat on low speed til evenly mixed
Fold in the mixture into the sifted flour mixture with spatula til well mixed
On separate bowl, beat on high speed egg whites til frothy
Gradually add in 40g sugar and continue beating til soft peak
Put in 1/3 of the flour mixture into the egg whites mixture and stir with spatula til well mixed and then pour back into the remaining flour mixture
Fold in til evenly mixed
Pour the batter onto the muffin liners til 3/4 full, bake 12 minutes approximately or til cooked

How to make ganache:
Chop dark chocolate and put in mixing bowl
Boil orange juice til left only 170ml pass through sieve, pour on the chopped dark chocolate
Stir til smooth and leave overnight in the fridge to firm

Make a dent at the centre top of cupcakes, brush with syrup from canned oranges and fill in with ganache
Top up with fresh fruits (I used fresh cranberries, fresh kiwis and canned oranges)

See, even Santa also can't wait to eat them hohoho....


I'm submitting this cuppies to Aspiring Bakers #14: Creative Christmas Bakes (December 2011) hosted by Hankerie

Tuesday, November 29, 2011

Red Velvet Cupcakes With Cream Cheese Frosting

One of the many recipes in my to do list, been so long there, so gotta put it into action :)

Red velvet cupcakes, do you believe it, I have never even once tried the taste of this pretty cake
So, one of the reason, or I can say, the first reason, is my curiousity about the taste... from the 'red', and the texture... from the 'velvet'
And my other question mark need an urgent answer, why this cake is always topped with cream cheese frosting

I really had no regret picking up this recipe to jump the queue :)
It's indeed such a beauty with quality!
There's no 'red' taste, it's just like when you eat chocolate cupcakes, not the dark deep rich type though
And the 'velvet' texture, I really can't agree more! It's pillowy soft, indeed reminds me of velvet :)

A truly keeper, in overall


Recipe is from Sweet Pea's Kitchen
The only thing I omitted was the cinnamon for the frosting


I'm submitting these cupcakes to   Aspiring Bakers #13: Enjoy Cupcakes (November 2011) hosted by Min

Wednesday, November 23, 2011

Bake Along #13 - Key Lime Cupcakes

Never heard nor ate this kind of cupcakes, curiousity won me over and there I was in the kitchen yesterday trying out the recipe


Yummy, sweet, tangy, soft, moist cupcakes, topped with all time favorite cream cheese frosting...that's what I like! :)

Recipe is from HERE
I followed exactly except that I reduced the amount of sugar for the cupcakes to 1 cup and added the lime juice to 3 tablespoons, also I reduced the green coloring to only 2 tiny drops
As for the frosting, I reduced the sugar to only 60g, omitted vanilla extract and the grated lime peel, replaced them with 1 tsp lime juice

I indeed enjoyed sinking my teeth into these delicious treat...see my teeth mark? LOL

I'm submitting these cupcakes to  Aspiring Bakers #13: Enjoy Cupcakes (November 2011) hosted by Min

And also for the third time, ƍ'm joining in the Bake Along event hosted by Lena, Zoe and Joyce...do hop to their blogs to view their pretty cupcakes too! :)

Friday, November 18, 2011

Easy Chocolate Mini Cupcakes

This is not only easy to make, no mixer needed, but it's really yummy, soft and moist - my kind of cupcakes
I made this batch for my kids' year end party today...yes, today is the last day of schooling, for the next one and a half month gotta scratch my head to entertain my too free kids LOL

Aren't they cute? I was not really in the mood of doing decorations so I just spread a little nutella at the centre of each cupcake and put marshmallow on top :)


Recipe is from HERE

What you need:
(I modified the amount of instant coffee powder used)

(A):120g butter, thaw to room temperature
75g chocolate chips
120g brown sugar
100g hot water
1 tsp instant coffee powder (or 1 packet of 3-in-1 coffee)
1 tsp coffee emulco

(B):
110g plain flour
1 and 1/4 tsp baking powder
1/4 tsp baking soda
25g cocoa powder
1 egg, beaten

Combine ingredients (A) in a bowl and double boil till smooth.  Leave it aside to cool.  Add in the beaten egg and mix well
Mix plain flour, baking powder, baking soda and cocoa powder together.  Sift the flour mixture and mix well into the melted chocolate mixture
Pour the batter into cupcake paper liners, about 70% full (the batter rise very well during baking).  Bake the cupcakes in a preheated oven of 160C for about 15 minutes(standard size cupcakes = 35 minutes) or till a wooden skewer comes out clean when inserted into the cupcake
Cool the cupcakes completely before decorating them (Note: These chocolate cupcakes are very soft, you may want to put the cooled cupcakes in the fridge for 30 minutes to harden them slightly before decorating)

When I fetched my kids this afternoon, they said the cupcakes were all gone so fast...so glad to hear that :)

I'm submitting these cute little cuppies to  Aspiring Bakers #13: Enjoy Cupcakes (November 2011) hosted by Min

Saturday, November 5, 2011

Nutella Cupcakes

All time favorite!
Easy to make, easy to finish too LOL


Recipe is from She Bakes & She Cooks

What you need:

10tbsp butter - softened
3/4 cup caster sugar
3 eggs
1/2tsp vanilla essence
1 3/4 cups sifted all purpose flour
1/4tsp salt
2tsp baking powder
Nutella approx. 1/3 cup

Preheat oven to 165degC
Line 12 muffin tins with paper liners
Cream together butter and sugar til light
Add in eggs one at a time, until fully incorporated
Dun worry if the batter dun look smooth
Add vanilla
Stir in flour, salt and baking powder til batter is uniform and no flour remains
Using an ice cream scoop, fill each muffin liner with batter
They shuld b 3/4 full – if u’re not using a scoop
Top each cake with 1 1/2tsp nutella
Swirl nutella in with a toothpick, making sure to fold abit batter up over the nutella
Bake for 20’
Remove to a wire rack to cool completely
Makes 12 large cupcakes
 
I'm submitting these cupcakes to Aspiring Bakers #13: Enjoy Cupcakes (November 2011) hosted by Min

Friday, November 4, 2011

Black Bottom Cupcakes

Very nice indeed, just like many reviews I read...


Recipe is from Joy Of Baking
I wish I put more cheese mixture on top with indentation at the centre like shown in the pic in the link above :)

I'm submitting these cupcakes to Aspiring Bakers #13: Enjoy Cupcakes (November 2011) hosted by Min

Friday, May 13, 2011

Easy Nutella Chocolate Brownies Cuppies

Easy to make and taste yummy - a combination I love :)
Moist, chocolatey - what else you can ask for?


The kids love them to the bits! Thks Zoe for this wonderful recipe!

What you need:
(makes 18 cupcakes / 24 mini cupcakes)

1/2 cup butter
1 oz unsweetened chocolate, finely chopped
1 cup sugar
1/4 cup unsweetened cocoa powder
2 large eggs
1 tsp vanilla
1/2 tsp salt
3/4 plain flour
1/2 cup Nutella

Preheat oven to 180degC. Line up tray with cupcake papers
In a heatproof bowl, microwave 1/2 cup butter to melt. Add chocolate, stir til melted, add sugar and cocoa powder. Stir to blend with wooden spoon
Whisk in eggs, vanilla and salt. Add flour and stir til smooth. Spoon batter evenly into the cups
Using the tip of the wooden spoon, make a small depression in each portion of batter. Spoon 1/2 tsp Nutella into each hole, using a toothpick - make a swirl
Bake until a toothpick inserted into the brownie part comes out with just a few moist crumbs, about 15minutes
Let cool and stored covered at room temperature

I'm submitting these brownies cuppies to Aspiring Bakers #7 – Chocolate Delight (May 2011) hosted by DG from Tested & Tasted at this LINK

Tuesday, April 19, 2011

Cream Cheese Minicakes

These cakes were so soft, moist and fluffy! My kind of cake! :)
Recipe taken Aunty Yochana's site - one of the blog I religiously followed when I just started to learn baking, still do til now to admire her ever pretty cakes :)


Cream cheese+raisins filling:

Cream cheese+chocolatechips filling:

What you need:

230g butter
100g icing sugar
1 egg
200g self-raising flour
30g toasted ground almond
100ml fresh milk

Filling:
Mix all the fillings together till smooth
(I mix all ingredients except raisins and choco chips and then divide into 2 portions - one mixed with raisins and the other ones mixed with choco chips)
100g cream cheese (I prepare 120g)
2 tbsps icing sugar
60 g raisins (I prepared 40g choco chips and 40g raisins)
20g whipping cream
1 tsp vanilla essence
Cream butter with icing sugar till creamy. Add in egg and cream till well mixed
Add in self raising flour, ground almond and fresh milk alternately till finished
Prepare pan as preferred (I use muffin papercups since I don't have mini loaf pans)
Scoop some batter into pan then scoop some filling in the center and top up with some batter
Bake at 175C for about 20 mins or till cooked
Remove from oven and overturn cakes onto wire rack to cool

I'm submitting these minicakes to Aspiring Bakers#6: Say Cheese! (April 2011) hosted by Jean from Noms I Must at this LINK