Showing posts with label birthday cakes. Show all posts

Tuesday, April 9, 2013

Devil's Food Cake For Mum's Bday

Baked this cake for my mum's birthday yesterday
She loves chocolate cakes, I baked devil's food cake with a very simple deco :)


Pic below taken last night :)


These two pics below taken this afternoon :)


A very easy to love kind of cake, the whole family enjoyed it so much :)

Recipe is from Small Small Baker, the texture is great, not too moist but not too dry, either
The recipe calls for taller two layered cake, I baked just half recipe with chocolate frosting on top

What you need:
(below is half recipe)
 
90g butter
190g caster sugar
2 eggs (60g each)
110g self-raising flour
40g plain flour
1/4 tsp bicarbonate of soda
35g cocoa powder
2 tsp dry instant coffee
60ml water
65ml milk
 
Chocolate frosting:
60g dark chocolate
60g unsalted butter
 
Method:
  1. Grease 20cm round cake pans, line bases with paper; grease paper
  2. Beat butter and sugar in small bowl with electric mixer until light and fluffy; add eggs 1 at a time, beating well after additions
  3. Transfer mixture to large bowl, fold in sifted flours, soda and cocoa with combined coffee, colouring, water and milk, in 2 batches
  4. Pour mixture into prepared pans; bake in preheated oven at 180C for about 45 minutes. Turn cakes onto wire rack to cool
Chocolate frosting:
  1. Combine chocolate and butter in heatproof bowl over pan of simmering water, stir until smooth. Remove from heat. Cool at room temperature until spreadable, stir occasionally while cooling
  2. Pour frosting over the cooled cake and spread evenly


Happy Birthday to my mum, I wish you only the best in everything, cos you deserve it
Love you! XOXO

Saturday, December 1, 2012

Bday Cake 4Hubby - Moist Devil's Food Cake (Martha Stewart)

I always a fan of Martha Stewart, she has a pair of super talented hands and fingers, not only in the kitchen but basically in every corner of the house and even outside the house!
So, I'm happy that this month's Cook Like A Star theme is Martha Stewart :)

This is her cake I wanted to try for so long, and this is the time for me to give it a shot, in conjunction to DH's birthday
Recipe is from HERE, very similar to other Devil's food cake recipe, actually
I modified a little and I didn't make the chocolate ganache, I used Nutella instead
Time constraint I had since it's school holiday now (read: me being lazy LOL)


What you need:
(recipe below is 1/2 recipe I made with slight modification)

170g unsalted butter
43g cocoa powder + extra to dust
1/4 cup boiling water
255g sugar
1/2 tbsp vanilla extract
2 large eggs
145g cake flour
1/2 tsp baking soda
1/4 tsp salt
1/2 cup fresh milk
1 1/2 tsp instant coffee powder

  1. Grease a 20cm round pan, line with paper and dust with cocoa powder
  2. Sift cocoa and coffee powder into the boiling water, whisk. Set aside to cool
  3. Cream butter (low speed) til light and fluffy. Gradually add in sugar - around 3 minutes
  4. Add in vanilla and eggs one at a time til well mixed
  5. In a large bowl, sift flour, baking soda and salt
  6. Whisk milk into the cocoa/coffee mixture
  7. With mixer on low speed, add in flour and milk/cocoa/coffee mixture into the butter mixture (starting and ending with flour)
  8. Pour batter into the prepared pan, bake until skewer comes out clean, around 35 minutes, rotate pan halfway for even baking
  9. Let cake cool on wire rack. Cut into two parts after it's completely cool
  10. Spread filling evenly on the top part of the bottom layer and top with the other layer

For DH's bday this time, I was so clueless about how to deco the cake
I ended up piped the whole cake with star tip. It looked more like white Xmas cake than birthday cake to me. But the most important thing is, he loved it, not only the deco but also the taste of this delicious cake, and so were the kids and me :)


This post is for Cook like a Star, organised by Zoe from Bake for Happy Kids, Baby Sumo from Eat your heart out and Riceball from Riceball Eats

Friday, November 2, 2012

Nutella Marbled Cake - Aurora Tiered Birthday Cake 4 Abigail

1 November was my 'lil princess 7th birthday
How time flies! I still remember what happened every single minute during the 10 hours I spent in the hospital waiting for her arrival.. and now, she's a sweet young girl celebrating her 7th birthday!

As usual, it's the special request birthday cake from the birthday girl
This time, she never specified any character she wanted on the cake. She just wanted a tiered cake, and it had to be a three tiered cake
Oopss! Something I never did before! Let alone three, I haven't even made two!
And thinking about smoothing the whole tiered cake with buttercream, it frustrated me even before I made the buttercream!
So, I decided to use fondant this time - the decision made with all my fingers and toes crossed since I, as you all know, am not good in cake decorating at all :)
But everything for my girl - I guess all mummies will agree with me :P

So, 31 October was the cake baking day, I baked Nutella cake using the recipe from Sam's site
This is the second recipe I made for Nutella cake and I definitely will stick to this recipe  This cake is really good, trust me!
It tasted better and had texture that I prefer, moist! Yes, I like moist butter cake
Well, anybody ever know somebody who likes dry butter cake? LOL
Just for reference, you may view the first recipe I made HERE
It's slightly different cos it's not marbled cake, it's plain butter cake with Nuttela mixed in the batter and then baked. It's nice, but this one is better :)

It's a really tiring day, I cooked, took care of the kids and house, baked two recipes of this cake, made buttercream, assembled the cake and crumb coated the cake and finally, the most daunting part - did the 'piling up high like mountain' dishes :-O
I was exhausted at the end of the day, my legs were so painful for long period of standing

The next day, on the day itself early morning I took out the cake from the fridge and rolled out the fondant
Big mistake of the day: I covered the cake with fondant while the cake was still cold
The next thing I knew, it started to have condensation everywhere
I could only stare in despair, for I couldn't do anything to remedy the situation
But I still went ahead to do the little deco here and there and in fact, I used the condensation as glue LOL
What worried me was the whole fondant would collapse, so I kept checking on the cake, patted here and there, tried to smoothen everywhere with my hands dusted with icing sugar wew.... Ants would love my house on that day :)
Luckily nothing major happened to the cake, I learnt my lesson and problem solved after I moved to cake into air conditioned room
But, as a price to pay for my negligence, some parts of the cake wasn't smooth at all :(

After done with everything, I was quite satisfied, despite the condensation tragedy
It's only my second fondant cake, after all (read: self consolation) LOL
Abby was thrilled and she was the one who took the initiative to choose and place Princess Aurora on top :)


The delicious cake, a must try!
I didn't manage to do the marble effect nicely, but who cares? The taste was just too awesome it didn't matter anymore :)


The excited birthday girl :)


Happy birthday my sweet little princess Abigail  XOXO :)

Monday, July 23, 2012

THB #6 Mocha-Cappuccino Marbled Coffee Cake - Another Birthday Cake For Ian

I baked this sixth cake for THB for Ian's birthday cake to be brought to his school to celebrate with his classmates

Among many car toys he loves, he adores Tomica the most
And the edible image on the cake below is his request :)


I was so tempted to add a little kahlua in the cake, but many kids would eat this cake, so no, not this time, but I am sure it would taste nice!
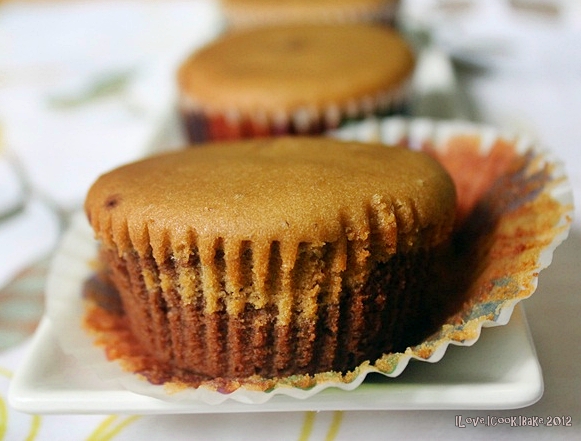
I baked some in cupcakes for our own consumption


From the book Coffee Cakes by Lou Seibert Pappas
Very straight forward cake to make, I love the coffee taste and aroma
Soft texture, light, not dry and yummy taste everybody in the house loves :)
I almost forgot that chocolate and coffee work well together, too - the color and the taste, too
I wasn't sure why I didn't get the marble effect, I did swirl the batter with skewer, perhaps I didn't do it correctly :)

I followed the recipe to the dot except that I reduced the sugar to 190g and I divided equally half each for chocolate and coffee batter
Used melted dark chocolate (50%) and added the coffee mixture to 2 1/2 tbsp for both the powder and water

For full recipe, please visit Lena's site, she chose this delicious tea time perfect companion :)
Please view HERE to check out other members' creations of this cake

Friday, July 20, 2012

Fire Truck Birthday Cake For Ian - He's 5 Today! - Gluten Free Steamed Brownies

See what I have made today, it's a birthday cake for Ian
He requested for a fire truck cake
He's not only a car lover, but also all kinds of trucks, buses and all heavy weight machines
Last year I did a car cake for him at his request too, so this year he switched to something else :)
Luckily I could find a tutorial for the cake from Betty Crocker, you may watch the video HERE
My first barbie cake last year also followed tutorial from Betty Crocker

It's a simple cake - well, looked simple enough to me but still I couldn't make as neat as the one in the video, as you know, I'm a big zero in cake decorating LOL

Anyway, Ian loved it so much!
He did watch the video too a couple of times, so when I did the carving and the frosting also the decorating, he was all the time beside me, watching me doing everything, and commenting what to do next :)


It's 100% buttercream frosting, the wheels are oreo biscuits, the lights are all gummies, and the hose is fondant, since I couldn't find black licorice

Hhhhmmm I wonder how to make my hands not trembling and moved steadily while doing the frosting, as you can see, those meant to be straight lines weren't straight, eg: the windows, and the rest... wew...
Well, what matters most is, the birthday boy was happy :)

I used Indonesian style Mrs Liem steamed brownies recipe, very well known among Indonesian foodies
Very fine texture, soft but sturdy enough to be used for 3D carved cake
Very yummy, moist and chocolatey

Here's the recipe, I made this cake gluten free by replacing the plain flour with gluten free flour mixture (GFF)

For the GFF:

1 cup rice flour
2/3 cup potato starch
1/3 cup tapioca flour

Mix well all three flours together in airtight container and store in it
Makes 2 cups

This GFF gives very satisfying result that mocaf flour can't compare
I definitely prefer this mixture

For the cake:

6 eggs
225g caster sugar
1 tsp vanilla extract
a pinch of salt
1/2 tsp sponge gel (optional)
125g GFF
50g cocoa powder (I used valrhona)
175ml canola oil
100g dark chocolate, melted
75ml sweet condensed milk
  1. Grease pans (I used 2 loaf pans)
  2. Beat eggs, sugar and sponge gel til ribbon stage (high speed)
  3. On low speed, add in sifted GFF flour, cocoa powder and mix well
  4. Add in melted chocolate and oil, mix well
  5. Divide the batter into three parts, one parts to mix with sweet condensed milk
  6. Preheat steamer til very hot
  7. Pour one part of the batter in the pans, and put them in steamer, steam for 10 minutes over medium fire
  8. Pour the batter with sweet condensed milk on top and steam for another 10 minutes
  9. Pour the last part of the batter and steam for another 20-25 minutes

For the buttercream, I used Aunty Yochana's recipe:

What you need:

200g sugar
60g water
140g egg white
300g butter
300g shortening
  1.  Boil sugar and water till thick but flowy
  2.  Beat egg white  (high speed) till fluffy (medium peak), then pour in the hot syrup
  3.  Continue beating the egg white till cool (low speed)
  4.  Slowly add in the chilled butter and shortening and let it beat till thick and fluffy
 
Here's a snap of the cake texture, so fine, chocolatey, soft and moist!


I'm submitting this post to Aspiring Bakers #21 Gluten Free Bakes hosted by Hankerie

Now, I have another cake to bake to bring to his school on Monday to celebrate with his friends
Wanted to do this morning but since today was Racial Harmony Day and they had programs at the school, so we're advised to do the celebration on Monday instead
 
 
To Ian, happy birthday to you
Mummy, daddy and Abby love you, as always!
God bless you always
Hugs and kisses XOXO

Monday, April 9, 2012

Gateau Africain 4 Mum's Birthday

Yesterday was my mum's birthday
I decided to bake one of her favorite cake, which I love too, Gateau Africain
It's a 3 layered soft chocolate sponge cake with creamy vanilla custard with a hint of rhum in between, really yummy!
My mum used to bake this cake for the family, now is my turn to bake for her :)

 
So here it is, with a simple decoration (you know I only can do simple deco right? LOL)
We had just a simple gathering last night, sang happy birthday, candle blowing and cake cutting :)

 
In case anybody wondering what is the meaning of the word OMA shown in the picture below...Oma is what many Indonesians call our grandmother, it's more to those influenced by Dutch background. My kids call my mum Oma, too so they requested to put the word on the cake :)


The cake was quite a huge one, so after the cake cooled, I halved and made it into a rectangle cake 10x20cm frosted by dark chocolate ganache and decorated the sides with Loacker dark chocolate wafers, tried to beautify the cake a little more with some little fondant decorations on top and wrapped the cake around with red ribbon :)


Somehow after I kept the decorated cake in the fridge for a few hours, the wafers were a little curled wew....


And the picture below were taken the next morning...
 
 
What you need:
(recipe is from my mum except the chocolate ganache is from Melly's site)
 
For the cake:
 
15 egg yolks
8 egg whites
160g fine sugar
175g cake flour
50g cocoa powder
100g butter, melted
  1. Preheat oven to 180degC
  2. Grease 22cm square pan and line with parchment paper and grease on top of the paper, set aside
  3. Beat on high speed eggs and sugar til it expands to doubled in size (mine tripled quite fast!)
  4. Add in sifted flour and cocoa on low speed
  5. Take 1/3 of the batter and mix with melted butter, pour back to the remaining batter and fold in gently til well mixed
  6. Pour batter into the pan and bake for approximately 30minutes or when the skewer comes out clean
  7. Remove from oven, wait for 5minutes before turning the cake to cooling rack
  8. Let cool completely
For the custard:
 
500ml fresh milk
100g fine sugar
50g plain flour
10g corn flour
2 egg yolks
1/2 tsp vanilla extract
1 tbsp butter
enough rhum
  1. Boil milk and sugar til sugar dissolved, until milk starts to bubble - stir continuously, off heat
  2. When it turns lukewarm, add in flour mixture and vanilla, mix well
  3. Add in egg yolks one by one slowly, and start to cook again medium low heat, keep stirring til thickened
  4. Add in butter and rhum, mix well and off heat
  5. Store in a container and let cool in the fridge
For the chocolate ganache:
 
250g dark chocolate, cut small
250ml whipping cream
40g unsalted butter
  1. Heat whipping cream in a pot over low heat til smooth and warm
  2. Add in chocolate and butter, mix well til all dissolved completely, off heat
  3. Keep stirring til smooth and thickened, let cool
  4. Store in a container and keep in the fridge
To assemble:
  1. After the cake is cool, keep in the fridge for a few hours (I kept it overnight) wrapped in clingwrap
  2. Take out from the fridge and cut into 3 parts
  3. Put one part on the cake base, spread with custard on top, top with the second part, spread another layer of custard on top, and then top with the third part
  4. Spread chocolate ganache all over the cake, make sure it's smooth at the top, the sides doesn't have to be so neat, cos it'll be covered with wafers
  5. Arrange wafers around the sides of the cake, and tie around with pretty ribbon
  6. Decorate the top of the cake as per you like
  7. I just made some shapes using my leftover fondant with cookie cutters
This is another all time favorite in my family and apparently very well known among Indonesians. If you google the name of this cake, those links appear are mostly from Indonesian bakers and/or bloggers
But I did see the recipe in All Recipes site too :)
 
So glad that mum enjoyed this cake as much as I do
Happy birthday to you mum, we all always love you *hugs and kisses*
 

Thursday, November 24, 2011

Soccer Black Forest Cake 4 Hubby's Bday

Yesterday was DH's bday
He requested for chocolate cake but this time I wanted to give a little twist instead of normal chocolate cake
So I baked this black forest, in fact it's my first time baking black forest
And also, he asked for soccer cake wew.... his fave sport among many others :)

At first I planned to bake 3D soccer ball cake, but I changed my mind and decided to bake soccer field cake instead with players on top

The problem was...it's so difficult to get the cake topper
Well, I did search pretty last minute, but I have seen it many times before and right on time when I needed one, it's out of stock everywhere wew....
So, I was contacting one online seller back in Indonesia who sells baking stuff, so fortunate she had one, so I arranged shipment to Singapore, bought a few small stuff to make full use of 1 kilogram shipping fee I gotta bear

One day before the day, I went to Poon Huat in the afternoon and saw many sets available! Aaarrrgghhh!!!
Worried that the shipment would come late, I bought a set
And in the evening, the parcel arrived...great!
So in the end, I now have 2 sets on hand LOL
The one used on the cake was the one I bought from Poon Huat

Well, having more than enough is still better than not getting what I need, so no complain.. I can give a set for my kids to play hihi...

Now the cake...the sponge cake recipe is from Sonia's site
Believe me, this cake is a keeper, I will definitely use the recipe for cake base again and again in the future! :)
Yummy in taste, seriously soft and fluffy in texture, and it's strong enough to hold thick layer of buttercream and toppers
I baked using 10inch rectangle pan to fit the theme


I cut the cake into two parts, brushed each top with heavy syrup from the canned dark cherries mixed with a little of kirsch, filling was whipped cream and dark cherries

Buttercream recipe was from HERE with slight adjustment, I made 1 1/2 recipe with sugar amount for 1 recipe, added 3/4 part with green coloring and mixed well (the remaining was for the lines)
Frosted the whole cake with green buttercream and I covered the sides with oreo crumbs
The lines were made using wrong tip, I should have used thinner one, mine was all fat lines LOL

You see... I guess I cut the cake unevenly :(

From this pic below that I have taken with my zero photography skill under the worst timing of the day - night time!, I hope you can see how soft this cake is :)

The bday boy and the kids, all of us really enjoyed the cake! So glad and thrilled to know that DH was delighted to see the cake he requested for was right in front of him :)

To my DH, happy bday...Love u always XOXO :)

Wednesday, November 2, 2011

My First Barbie Cake... Happy Birthday My Girl, Abigail :)

This is a special request from Abby since last July ever since she saw me making car cake for Ian's birthday :)


I don't have the pan designed to bake Barbie dress, so what I did was... I baked two recipes of cocoa butter cake (I didn't give marble effect this time, instead I poured the vanilla butter first and the cocoa batter on top) 
I used three round pans in different sizes - 6", 5" and 3" (in fact I still had some leftovers so I baked another one in 5" pan)

To make the dress...
After cooled,  I made a hole at the centre of each cake (approximately 7cm diameter), stacked the three cakes, 6" at the bottom, topped with the 5" and the last one was the 3" cake, with buttercream frost in between
Using serrated knife, I carved the cake to shape a long dress (just using my imagination)
After done, I frosted the whole cake with buttercream, smoothen it up and kept it in the fridge for around one hour
After that, I frosted the whole cake again, this time a thick one, and I decided to give swirl effect all over the cake (this is much easier to be done on a thick buttercream)
I then inserted the doll which has been wrapped tightly with clingwrap from chest down
I added some frosting to cover the hole around the waist area and do the swirls also
I piped the edge of the dress with star nozzle and put sugar pearls on each star
Also I decorated the dress with sugar stars all over so that it wouldn't look too plain

Now, for the bodice....I initially planned to pipe all over with small star nozzle, then I realized I don't have any wew...
So I decided on fondant, I cut a rectangle shape and wrap all around the top part of the doll
Press here and there to adjust the bodice to get the perfect shape
I added some sugar pearls and hearts to beautify the bodice

That's all, sounds easy but for first timer like me, especially when you know my decorating ability, it's quite a challenge :)

So glad and satisfied to see how thrilled Abby was but couldn't bear to see when it's time to cut the cake hehe...

The happy bday girl in Cinderella costume :P

As usual, I made another cake to bring to school... Also her request, Cinderella cake, since she wore the costume to school :)


With the same cake as Barbie cake, used edible image and simple deco using buttercream
So glad to hear when Abby told me that her classmates said the cake's so yummy :)

Again, happy birthday to you my beloved Abby :) Stay pretty and good girl as always, mummy and daddy are so proud of you and will always love you, as well as you little brother, Ian.. God bless u!
XOXO

Monday, October 24, 2011

Japanese Strawberry Shortcake...Happy B'day To Me :)

My sis wanted to buy cake for my bday yesterday but I told her that I planned to bake one for myself
She scratched her head and said, you're the bday girl and you're the one who's going to bake your own bday cake? :)

This is one of my favorite cake, but this was my first attempt...it's also one of Abby's fave :)
Satisfied with the result, soft, light and fluffy sponge cake layered and covered with whipping cream with cut strawberries in between layers, yum!
Abby has to have two slices everytime, in fact as I'm writing this, she is now eating the last slice :)
I'm so happy I can bake another fave cake of hers, as usually I'd run to Four Leaves everytime her cravings for this cake kicked in hihi...

Before you view the pics below, please pardon the quality of the frosting, you know me...my weakness in cake deco hehe...


Recipe is from Dailydelicious, I don't have 7" round cake pan, so I used 8" and sliced the cake into two instead of three

What you need:

For the cake:
3 eggs
90g sugar
90g cake flour (sifted)
20g unsalted butter (melted)
20ml milk

For the syrup:
80g sugar
100ml water
2 tsp kirsch gel (or you may change to other liqueur or 1 tsp vanilla extract)
===> Bring to boil over low heat in small pot sugar and water, let cool, add in liqueur

For the whipped cream:
400ml whipped cream
40g icing sugar
===> Beat til forms medium stiff peak

Preheat oven to 180degC
Line pan with baking paper
Beat eggs in high speed til lighter in color, gradually add sugar into the eggs and beat til ribbon stage
Take 3/4 cup of the mixture, mix with melted butter
Add in sifted flour into the remaining of the eggs mixture, fold in gently til well combined
Pour the 3/4 cup of the eggs+butter mixture into the remaining eggs+flour mixture, fold gently and follow with milk, fold in gently til well combined
Pour mixture into pan, bake for 25minutes approx
Let cool, once cooled cut into layers (either two or three as you like), brush each top with kirsch mixture
Place one layer of the cake, place cut strawberries on top of the cake, pour whipped cream over strawberries, put another layer of cake over the cream, and frost the top and sides of the cake with the remaining cream
Decorate with whole strawberries
Refrigerate

Homemade cake on birthday - what can be better? :)

Friday, July 22, 2011

My First Fondant Cake, My First 3D Car Cake

I usually make two cakes for my kids' birthdays - one to bring to school, one to eat at home
Ian's bday was a few days ago - 20th July
The one for school is already in the plan - it's a cake with edible image on top, he chose the pic himself - Lighting Mcqueen (what else *grin*)
I was more than clueless when Ian requested for a 3D car cake for his bday at home
To please the birthday boy whom is a super die hard car fanatic, I said yes, with much uncertainties in my mind (this explained my absence from updating my blog for the past few days hehe...)

I was planning to buy a car shape pan but I didn't in the end, I decided to carve the cake instead
Watching step by step tutorial in several videos in Youtube, again and again, and finally I decided to decorate the cake with fondant instead of buttercream - less hassle and I guess it'd be more fun, just like playing with playdoh - I guess, based on theory only :)
I have never ever made a fondant cake before, the only time was only decorating three small cupcakes - and it took me close to an hour for those three lil things *lol

Preparing the tools and ingredients, I realized fondant related stuff is really pricey, some stuff I just closed my eyes and told myself it's a one time investment hehe...
And the fondant itself, gee...I guess next time I will just make myself, but it's involving kneading - alot! so, gotta see other factors too like time, energy and the most important - mood! :)

Okay, so all tools and ingredients ready, and the war began...it took me two days to prepare the two birthday cakes, two hectic busy days - I should have been able to be more relax in the process if I didn't have to care for the kids and house at the same time! *faint*
Well, I too have to thank my family for their understanding cos these two days I didn't cook at all for them hihi...
I guess it's not only time constraint, but also mental pressure that made me feel so tired hehe...

In the end, whatever I felt during those two days were gone instantly when I saw Ian's eyes full of excitement, he was so delighted to see the car :)
Now I fully know, whats the meaning of self satisfaction when people love your creation, especially if it's your loved one :)
It makes you want to do even more, much more!

And to my surprise, I found out that I really enjoy playing with fondant! :)
But the most painful part was when you saw the cake being cut in seconds! *lol

So, here it is... I must say, it's still far from perfect, but knowing that my skill level in decorating is below ground zero, I can't help but feel proud of myself hihihi :)


The cake is Devil's Food Cake I made before - I made two recipes (leftovers were gone in seconds hihihi...)

Stacked them up with buttercream filling in between, shaped it like a car with a long knife utilizing my imagination to the maximum, covered the whole cake with buttercream, let it set in the fridge for a few hours 

Rolled the yellow fondant with the most expensive baking stuff I ever bought - PME fondant rolling pin (ppfff...), took the cake out from the fridge, cover it up with the yellow fondant, press press press...cut the remaining fondant at the sides with pizza cutter, smoothen with fondant smoother all over

I put the cake in my aircon room overnight (to prevent hot and humid Singapore weather)
The next day, on the birthday date itself, I did the deco

I prepared 2 oreo cookies, discard the filling and I had 4 round cookies, covered them up with black fondant and I got 4 wheels, painted the centre with silver pearl dust which I mixed with vanilla essence - and pasted them up with water
Measured and shaped the four windows with black fondant, the door handles, wipers, spoilers, licence plates - all with black fondant too (ooppss, I forgot to write the licence number hihihi...)
Mixed yellow fondant with orange food coloring for the front lights and red food coloring for the rear lights

Here is the happy boy - slicing my two days of hard work hihihi....

After the brutal action done by him...

My last pic - the uncut part hihihi...

Oh before I forgot, here is the cake I made for his school...


I was not pleased with this cake at all, I am not til now - I could have done better
The cake is moist chocolate cake I made for Abby's bday last year - delicious!
The difference is this cake is much bigger, I made two recipes in two pans and stacked them up together

Now, I had no idea that this cake is so fragile that it's a no no to lift it up, so when I did, it cracked into four parts - I was so panicky at that time and ready to bake another one recipe but then I tried to patch them up together like making a puzzle using buttercream as the 'glue' and it worked, so I just went ahead to paste the edible image - picture chosen by Ian himself :)

After everything done, I realized that the cracks were visible - but I couldn't do anything so no choice..
And also, cos the top cake was cracked, I didn't dare to cut the top part to level it up, so the cake did not have flat top - I only tried to make it as smooth as possible
Well, never mind the cracks, Ian and his friends' jaws were still dropped when saw this cake - hehe....

So....aside from all he hiccups, I really did have fun doing it
What a delight to see Ian very excited to have his mummy's amateur creations hihihi....

Happy birthday my lil boy - time flies so fast you are 4 yrs old now - be good okie...Mummy & Daddy also Abby love you *huggggzzzzz :)