We decided to throw a surprise slumber party for my daughter on her seventh birthday. It was a huge hit and my daughter was thrilled! There were 6 girls at the party and we had a fantastic time making homemade mini pizzas, playing freeze dance, watching a Barbie movie, playing hide and seek, painting nails and of course, staying up late. I wanted to make something simple and tasty for breakfast so I made this blueberry and coconut coffee cake I found at
Week of Menus. It was really easy to make and tasted wonderful. My daughter especially loved it. I served this cake with fresh fruit, bacon and scrambled eggs for a quick, simple and delicious breakfast.
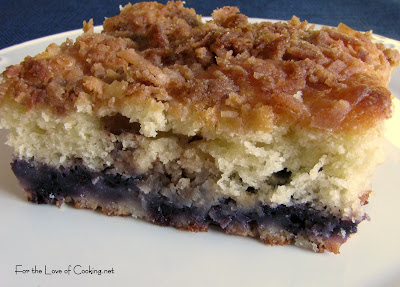
Blueberry and Coconut Coffee Cake:
Recipe and photos by For the Love of Cooking.net
Topping:
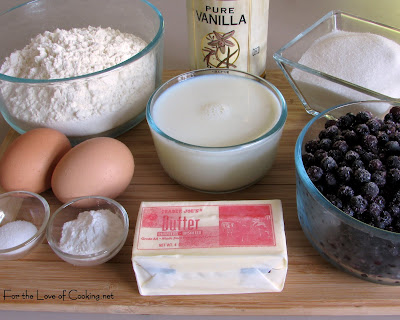
- 1/3 cup flour
- 1/4 cup butter, room temperature
- 1 cup sweetened coconut
- 1/2 cup packed brown sugar
- 1 tsp ground cinnamon
Combine the flour, butter, coconut, brown sugar, and cinnamon in a small bowl. Mix until moist and crumbly. Set aside.
Cake:
- 2 cups flour
- 2 1/2 tsp baking powder
- 1/2 tsp salt
- 1/2 cup butter, room temperature
- 1 cup sugar
- 2 large eggs
- 1 tsp vanilla extract
- 1 cup milk
- 2 1/2 - 3 cups of fresh blueberries, or frozen (unthawed)
Preheat the oven to 375 degrees. Coat your 9x13x2 baking dish with cooking spray. Sift the 2 cups of flour, baking powder, and salt into a small bowl. Using a mixer, beat the butter in a large bowl until fluffy. Gradually add 1 cup of sugar, beating until well blended. Add the eggs one at a time, beating to blend after each egg. Mix dry ingredients into the batter alternating with milk, 3 additions each.
Pour half of the batter into the prepared baking dish making sure to spread it evenly; sprinkle the blueberries over the top. Add 1/2 cup of the topping mixture on top of the blueberries. Pour the remaining batter on top. Sprinkle the rest of the topping over the batter evenly.
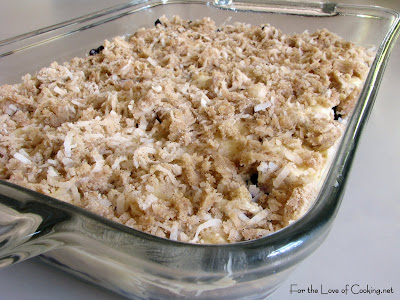
Bake for 35-40 minutes or until a tester inserted into the center of the cake comes out clean. Let cool for a few minutes before serving. Enjoy.


