Friday, July 29, 2011

Lapis Roll

My last submission for this month's Aspiring Bakers event - at the same time to fulfill my craving of this Indonesian traditional cake :)

One of the most difficult cake to bake - time consuming and lots of patience required, but it's really worth to go thru all after you sink your teeth on this moist cake
Often called a thousand layer cake cos of the many thin layers - but this time I made a twist since I myself is busy packing my stuff
I made just four layers and roll it up :)


Recipe is from Rima's site
(a little modified by me)

140g creamery butter (I used Golden Churn)
1 tbsp condensed milk
12 large egg yolks
90g icing sugar - sifted
1/2 tsp vanillin powder
1/2 tsp mixed spice powder (spekoek powder)
10g cake flour - sifted
5g milk powder - sifted

Preheat oven to 160degC
Grease, lay with parchment paper and grease again a square pan (I used 24x24cm)
Beat butter til pale and light, add in condensed milk - beat well, set aside
In a separate bowl, beat eggs, icing sugar and vanillin & mixed spice powder til thick and pale
In low speed, add in flour and milk powder - mix well
Divide the batter into four
Spread the first layer, bake with top+bottom fire for 3 minutes, switch to top fire and bake til golden brown
Spread the second layer, and bake exactly like the first layer
Followed by the third and fourth layer
Final bake with top+bottom fire for 3 minutes
Take out from the oven, let cool on the cooling rack
Roll with parchment paper away from you while it's warm - tighten it
Let it set in the paper for approximately 10minutes
Take out the paper and cut

Such a sinful indulgence - every bite worth the effort :)

I'm submitting this roll to Aspiring Bakers #9 Swiss Roling Good Times hosted by Lynn from Obsessedly Involved With Food at this LINK

Now, back to packing business - tomorrow is my D-day for moving out
No internet connection from tomorrow and back to normal on Monday evening

Pineapple, Banana, Coconut, and White Chocolate Chip Bread

My kids wanted to bake something for their afternoon snack so after looking in my cupboards to see what we had to use we went in search of a fun new recipe to try. This bread was easy to make and it smelled fantastic while it baked. It was a HUGE hit with my kids and my husband enjoyed some for dessert after dinner.

Pineapple, Banana, Coconut, and White Chocolate Chip Bread:
Adapted recipe and photos by For the Love of Cooking.net
Original recipe by Taste of Home
  • 1/2 cup of butter, softened
  • 1 cup of white sugar
  • 1 tsp vanilla extract
  • 2 eggs
  • 2 very ripe bananas
  • 1/2 cup drained pineapple tidbits
  • 1/2 cup sweetened shredded coconut (plus more for topping)
  • 1/2 cup white chocolate chips
  • 2 cups of flour
  • 1 tsp baking powder
  • 1/2 tsp baking soda
  • 1/2 tsp salt
Preheat the oven to 350 degrees. Coat a bread pan with cooking spray.

Cream the butter and sugar together in a bowl with a beater. Beat in the eggs and vanilla extract. Stir in the mashed banana, pineapple, coconut, and white chocolate chips.

Mix the flour together with the baking powder, baking soda, and salt. Add the flour mixture to the banana mixture until just combined. Pour the batter into the prepared bread pan. Sprinkle a little more coconut on top of the batter.

Bake in the oven for 65-70 minutes or until a tester inserted in the center comes out clean. Cool in the pan for 10 minutes; remove to a wire rack. Slice and serve. Enjoy!


Thursday, July 28, 2011

Soy Sesame Edamame

This is such a quick, easy, and delicious snack or side dish. I made this for my kids as a snack after their swimming lessons and they LOVED it. I swear the bowl of edamame disappeared within 5 minutes of me serving it to them. This will be a regular on our table from now on.

Soy Sesame Edamame:
Recipe and photos by For the Love of Cooking.net
  • 1 1/2 cups of whole edamame
  • 1 tbsp soy sauce
  • 1 tsp sesame oil
  • 1 clove of garlic, minced
Heat a skillet over medium heat. Add the soy sauce, sesame oil, and garlic together in the skillet and mix well. Add the edamame and stir to coat evenly. Cook for 4-5 minutes, stirring often. Remove from the skillet and serve. Enjoy!

Note: To eat whole edamame, simply put the pod into your mouth, bite down and pull through your teeth (similar to eating an artichoke leaf), the soybeans pop out of the pod and into your mouth. Discard the pods.


Wednesday, July 27, 2011

Caprese Pasta Salad with a White Balsamic Vinaigrette

This recipe was inspired by my oldest sister Dana. She called me recently and suggested I make caprese salad combined with pasta and since I am a dutiful younger sister I complied. I decided to dress the pasta salad with a simple white balsamic vinaigrette and it turned out fantastic! I really loved the fresh basil, combined with the creamy cheese, sweet tomatoes, soft pasta, and tangy vinaigrette. My whole family enjoyed this dish, especially my son who had 3 servings. I served this pasta salad with Basil Marinated Chicken Thighs and they paired nicely together. Thanks for the inspiration Dana!

Caprese Pasta Salad with a White Balsamic Vinaigrette:
Recipe and photos by For the Love of Cooking.net
Inspired by my sister Dana

Pasta Salad:
  • 8 0z gemelli pasta, cooked per instructions
  • Handful of grape tomatoes
  • Mozzarella cheese, diced into small cubes
  • Fresh basil, chiffonade
Cook the pasta in well salted water per instructions. Drain and rinse under cold water until the pasta is cool. Place the pasta into a serving bowl then add the grape tomatoes, mozzarella cheese cubes, and fresh basil.

White Balsamic Vinaigrette:
  • 2 tbsp canola oil
  • 1 tbsp olive oil
  • 1 1/2 - 2 tbsp white balsamic vinegar
  • 1/2 tsp of sugar
  • 1 clove of garlic, minced finely
  • Sea salt and freshly cracked pepper, to taste
Combine all the ingredients together with a whisk until well combined. Taste, add more vinegar, sugar, sea salt, or pepper if desired.

Pour the vinaigrette over the pasta salad and mix until coated evenly. Serve and enjoy!


Tuesday, July 26, 2011

Basil Marinated Chicken Thighs

I was looking for a simple marinade for chicken thighs that used fresh basil (since I have loads of it). I found this recipe on the Food Network that looked easy and delicious. I let the meat marinate for 6 hours but longer would be even better. This marinade gave the chicken such a wonderful flavor that my entire family loved. A simple, tasty, and easy dish - perfect for a busy weeknight!

Basil Marinated Chicken Thighs:
Adapted recipe by For the Love of Cooking.net
Original recipe by Food Network
  • 5 boneless, skinless chicken thighs
  • 1 tbsp olive oil
  • 1 tbsp red wine vinegar
  • 1 clove of garlic, minced finely
  • 1 1/2 tbsp fresh basil, chopped
  • Sea salt and freshly cracked pepper, to taste
Remove any extra fat off of the chicken thighs then place into a large zip lock bag.

Whisk together the olive oil, vinegar, garlic, basil, sea salt, and freshly cracked pepper, to taste, until well combined. Pour over the chicken thighs and shake them to combine evenly. Refrigerate for 3-12 hours.

Remove the chicken from the refrigerator 20 minutes prior to cooking. Heat a grill pan that has been coated with cooking spray over medium high heat. Season each chicken thigh with a bit of sea salt and freshly cracked pepper, to taste, on both sides. Place the chicken thighs into the hot grill pan and cook for 4 minutes then flip over. Cook for another 4-5 minutes, or until the chicken is cooked through. Remove from the grill pan and let the meat rest for 5 minutes before serving. Enjoy.


Monday, July 25, 2011

Garlic Cheddar Chicken & Stir Fry 3 Colors Capsicums

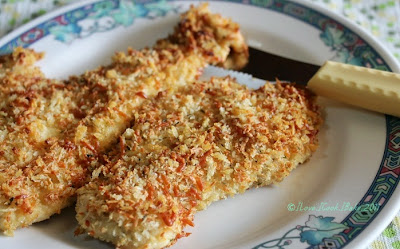
Another yummy and easy combo dish :)

Garlic cheddar chicken
These 3 words are all my fave :)

Crisp on the outside, tender and juicy in the inside :)

Recipe is from Quay Po's site (a little modified by me)

What you need:

1/2 cup butter
5 cloves of garlic - minced
3/4 cup dry breadcrumbs
1/2 cup grated parmesan cheese
1 1/2 cup grated cheddar cheese
1/4 tsp dried parsley
1/4 tsp dried oregano
1/4 tsp ground black pepper
1/8 tsp salt
4 skinless boneless chicken breast - lightly pounded and halved

Preheat oven to 175degC
Sautee the garlic with butter til fragrant
In a separate bowl, mix breadcrumbs with both cheeses, parsley, oregano, pepper, salt
Dip each chicken in garlic butter and press both sides on the breadcrumb mixture
Arrange the coated chicken on baking dish and drizzle the remaining garlic butter on top and cover with the remaining breadcrumb mixture
Bake 30minutes til chicken turn white and juice runs clear
Serve hot

Now, the vegetable dish...

I love love love capsicum - crunchy, sweet, bright and healthy - green, red and yellow
Eat them raw, eat them cooked - I don't mind both :)
When I went to supermarket to buy them, I saw orange and black too!
In the end I chose the 3 common colors I normally buy  - even though I was curious about the taste, especially the black one :)

Here it is, I just sliced them, stir fried together with onion which has been sauteed with a little oil, added salt, pepper, oyster sauce, a little sugar and water - stir stir stir, and that's it
Do not cook for too long, otherwise the capsicums will turn soft - no no no... :)

Yummy and easy combo dish - isn''t it? :)

I've been pretty slow in updating my blog recently - also visiting other blogs...
At first was being occupied in Ian's bday cakes project, and now is busy busy busy packing my stuff - going to move in to a new place this coming Sunday, so this week is gonna be busy packing - and next week unpacking pppfff...

There are still my cookings for my family, but they need to queue now to be posted :)


Southwestern Chicken, Bean, and Sharp Cheddar Quesadilla AND Giveaway Winner

I decided to combine the last little bit of stuffing I made for the Southwestern Stuffed Portobello Mushrooms with some refried beans, extra sharp cheddar, and corn tortillas together for a tasty quesadilla. The combination of chicken, corn, cilantro, tomatoes, spinach, green onions, spices, corn tortillas, sharp cheddar, and beans was fantastic - I loved the flavors and textures of this quesadilla. This recipe was the perfect way to use up my leftovers - quick and simple too!

Southwestern Chicken, Bean, and Sharp Cheddar Quesadilla:
Recipe and photos by For the Love of Cooking.net
Find recipe for the stuffing here.

Heat a skillet coated with cooking spray over medium heat.

Layer the corn tortillas with refried beans, Southwestern chicken stuffing, and sharp cheddar cheese. Place the other tortilla on top.

Place in the skillet and cook for 3-4 minutes or until golden brown. Carefully flip the quesadilla over and cook for an additional 3 minutes or until golden brown. Remove from the skillet and let the quesadilla cool for a few minutes before slicing into four equal pieces. Serve with sour cream or salsa. Enjoy.


GIVEAWAY WINNER:


The winner of the Slim & Scrumptious Cookbook is comment number 17:

This all looks delicious!!! I can't wait to make it. I would love this cookbook, it looks awesome.


Congratulations! Please e-mail me with your full name and address so the cookbook can be mailed to you.


Friday, July 22, 2011

Cinnamon Cheesecake Fondue AND a GIVEAWAY!!

I found this recipe in my new cookbook by Joy Bauer called Slim & Scrumptious. This was a fun and quick dish I made for my kids' afternoon snack this week. Needless to say it was a HUGE hit with both of my kids and they gobbled up every last bite. It was fun for them to eat and it was a great way to load up on fresh fruit. My daughter liked to dip the fruit and crackers directly into the dip while my son liked to spread the dip on the graham cracker then top it with a piece of fruit - just like a real piece of cheesecake. This one is a keeper!

Cinnamon Cheesecake Fondue:
Adapted recipe and photo by For the Love of Cooking.net
Original recipe by Joy Bauer ~ Slim & Scrumptious
  • 1/4 cup of low fat cream cheese, at room temperature
  • 6 tbsp non fat sour cream
  • 1 1/2 tbsp brown sugar
  • 1/2 tsp ground cinnamon
  • 1/4 tsp vanilla extract
  • Cherries
  • Strawberries, sliced
  • Apple, sliced
  • Plum, sliced
  • Kiwi, peeled & sliced
  • Graham crackers
Combine the cream cheese, sour cream, brown sugar, cinnamon, and vanilla extract together in a bowl, mixing them vigorously with a whisk until smooth and creamy. For best results, refrigerate for 30 minutes prior to serving.

Serve the dip with fresh fruit of your choice and graham crackers. Enjoy!


GIVEAWAY:

Giveaway prize is a copy of Slim & Scrumptious by Joy Bauer

Leave a comment to enter into the Slim & Scrumptious by Joy Bauer cookbook giveaway. I will be honest in saying that I really, REALLY, love this cookbook. It is filled with flavorful yet healthy recipes that are great for the entire family.

One lucky winner will be announced on Monday's (July 25, 2011) post. Contest ends on Sunday, July 24rd, 7:00 p.m. Pacific Time.

Be sure to check out the Joy Bauer website, Twitter, and Facebook pages.

My First Fondant Cake, My First 3D Car Cake

I usually make two cakes for my kids' birthdays - one to bring to school, one to eat at home
Ian's bday was a few days ago - 20th July
The one for school is already in the plan - it's a cake with edible image on top, he chose the pic himself - Lighting Mcqueen (what else *grin*)
I was more than clueless when Ian requested for a 3D car cake for his bday at home
To please the birthday boy whom is a super die hard car fanatic, I said yes, with much uncertainties in my mind (this explained my absence from updating my blog for the past few days hehe...)

I was planning to buy a car shape pan but I didn't in the end, I decided to carve the cake instead
Watching step by step tutorial in several videos in Youtube, again and again, and finally I decided to decorate the cake with fondant instead of buttercream - less hassle and I guess it'd be more fun, just like playing with playdoh - I guess, based on theory only :)
I have never ever made a fondant cake before, the only time was only decorating three small cupcakes - and it took me close to an hour for those three lil things *lol

Preparing the tools and ingredients, I realized fondant related stuff is really pricey, some stuff I just closed my eyes and told myself it's a one time investment hehe...
And the fondant itself, gee...I guess next time I will just make myself, but it's involving kneading - alot! so, gotta see other factors too like time, energy and the most important - mood! :)

Okay, so all tools and ingredients ready, and the war began...it took me two days to prepare the two birthday cakes, two hectic busy days - I should have been able to be more relax in the process if I didn't have to care for the kids and house at the same time! *faint*
Well, I too have to thank my family for their understanding cos these two days I didn't cook at all for them hihi...
I guess it's not only time constraint, but also mental pressure that made me feel so tired hehe...

In the end, whatever I felt during those two days were gone instantly when I saw Ian's eyes full of excitement, he was so delighted to see the car :)
Now I fully know, whats the meaning of self satisfaction when people love your creation, especially if it's your loved one :)
It makes you want to do even more, much more!

And to my surprise, I found out that I really enjoy playing with fondant! :)
But the most painful part was when you saw the cake being cut in seconds! *lol

So, here it is... I must say, it's still far from perfect, but knowing that my skill level in decorating is below ground zero, I can't help but feel proud of myself hihihi :)


The cake is Devil's Food Cake I made before - I made two recipes (leftovers were gone in seconds hihihi...)

Stacked them up with buttercream filling in between, shaped it like a car with a long knife utilizing my imagination to the maximum, covered the whole cake with buttercream, let it set in the fridge for a few hours 

Rolled the yellow fondant with the most expensive baking stuff I ever bought - PME fondant rolling pin (ppfff...), took the cake out from the fridge, cover it up with the yellow fondant, press press press...cut the remaining fondant at the sides with pizza cutter, smoothen with fondant smoother all over

I put the cake in my aircon room overnight (to prevent hot and humid Singapore weather)
The next day, on the birthday date itself, I did the deco

I prepared 2 oreo cookies, discard the filling and I had 4 round cookies, covered them up with black fondant and I got 4 wheels, painted the centre with silver pearl dust which I mixed with vanilla essence - and pasted them up with water
Measured and shaped the four windows with black fondant, the door handles, wipers, spoilers, licence plates - all with black fondant too (ooppss, I forgot to write the licence number hihihi...)
Mixed yellow fondant with orange food coloring for the front lights and red food coloring for the rear lights

Here is the happy boy - slicing my two days of hard work hihihi....

After the brutal action done by him...

My last pic - the uncut part hihihi...

Oh before I forgot, here is the cake I made for his school...


I was not pleased with this cake at all, I am not til now - I could have done better
The cake is moist chocolate cake I made for Abby's bday last year - delicious!
The difference is this cake is much bigger, I made two recipes in two pans and stacked them up together

Now, I had no idea that this cake is so fragile that it's a no no to lift it up, so when I did, it cracked into four parts - I was so panicky at that time and ready to bake another one recipe but then I tried to patch them up together like making a puzzle using buttercream as the 'glue' and it worked, so I just went ahead to paste the edible image - picture chosen by Ian himself :)

After everything done, I realized that the cracks were visible - but I couldn't do anything so no choice..
And also, cos the top cake was cracked, I didn't dare to cut the top part to level it up, so the cake did not have flat top - I only tried to make it as smooth as possible
Well, never mind the cracks, Ian and his friends' jaws were still dropped when saw this cake - hehe....

So....aside from all he hiccups, I really did have fun doing it
What a delight to see Ian very excited to have his mummy's amateur creations hihihi....

Happy birthday my lil boy - time flies so fast you are 4 yrs old now - be good okie...Mummy & Daddy also Abby love you *huggggzzzzz :)

Thursday, July 21, 2011

Pistachio Chicken Salad Sandwich

I was recently sent the Joy Bauer cookbook called Slim & Scrumptious that I am really loving. I have so many recipes in it bookmarked including this chicken salad sandwich. I had leftover roasted chicken to use up so I decided to try this sandwich for dinner. I adapted it a bit by using less mayonnaise and red wine vinegar instead of white wine vinegar. It took minutes to make and tasted wonderful. I loved the creamy chicken with the crunchy & salty pistachios, and the sweet roasted bell pepper - the combination of flavors and textures is perfect. My kids thought it was just okay but my husband and I both really, REALLY liked it.

Pistachio Chicken Salad Sandwich:
Recipe and photos by For the Love of Cooking.net
Original recipe from Slim & Scrumptious by Joy Bauer
  • 1/4 cup of reduced fat mayonnaise
  • 1 tbsp red wine vinegar
  • Sea salt and freshly cracked pepper, to taste
  • 2 cups of roasted chicken, chopped
  • 1/4 sweet yellow onion, finely diced
  • 2 stalks of celery, finely diced
  • 1/4 cup of roasted bell pepper, diced *
  • 1/4 cup shelled pistachios
  • Sandwich Thin (or bread of your choice), toasted
  • Lettuce
  • Tomato slices
*To roast the peppers: Clean the bell pepper then carefully slit it in half removing the seeds and stem. Line a baking sheet with tin foil then place the pepper halves on top skin side up. Place the baking sheet on the top shelf of the oven and broil them until the peppers are blackened on all sides. Transfer the peppers to a large bowl, cover with plastic wrap, and let cool for 10 minutes. Once the peppers are cool enough to handle, remove the blackened skin VERY CAREFULLY. Dice the peppers.

Whisk the mayonnaise, vinegar, sea salt and freshly cracked pepper, to taste, together in a small bowl until well combined. Add the chopped chicken, yellow onion, celery, roasted pepper, and pistachios, then stir to coat them evenly with the dressing.

Toast a sandwich thin or bread of your choice then lightly coat the toast with a little bit of mayonnaise. Layer the bread with lettuce, tomato slices, chicken salad, freshly cracked pepper. Serve open faced. Enjoy.


Wednesday, July 20, 2011

Southwestern Stuffed Portobello Mushrooms

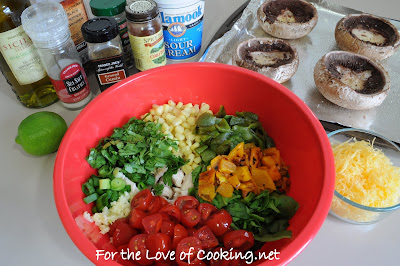
I saw this recipe on Mommi Cooks and it looked so delicious I made it the next night for dinner. I loved the combination of flavors and textures in this dish, especially the sweet corn, spicy poblano pepper, and moist chicken. It was fairly simple to make and tasted really wonderful. My husband and I both loved this dish and I will definitely be making it again and again.

Southwestern Stuffed Portobello Mushrooms:
Adapted recipe and photos by For the Love of Cooking.net
Original recipe by Mommi Cooks
  • 4 portobello mushrooms, stems removed
  • 4 tsp olive oil
  • Sea salt and freshly cracked pepper, to taste
  • 2 cups of roasted chicken, chopped
  • 1 tsp cumin
  • 1/2 tsp coriander
  • 1/4 tsp chili powder
  • 1/2 tsp oregano
  • Orange bell pepper, roasted and chopped *
  • Poblano pepper, roasted and chopped *
  • 3/4 cup of frozen sweet corn, thawed
  • 1/2 cup of baby spinach, chopped
  • 1/2 cup of grape tomatoes, sliced
  • 1 clove of garlic, minced
  • 2 tbsp green onions, chopped
  • 2 tbsp fresh cilantro, chopped
  • 1/4 cup of sour cream
  • 1/2 lime, juiced
  • Extra sharp cheddar
*To roast the peppers: Clean the poblano pepper and bell pepper then carefully slit them in half removing the seeds and stem. Line a baking sheet with tin foil then place the peppers on top skin side up. Place the baking sheet on the top shelf of the oven and broil them until the peppers are blackened on all sides. Transfer the peppers to a large bowl, cover with plastic wrap, and let cool for 10 minutes. Once the peppers are cool enough to handle, remove the blackened skin VERY CAREFULLY. Chop the peppers up.

Preheat the oven to 375 degrees. Line a baking sheet with tin foil (for easier clean up).

Remove the stem from the mushrooms then drizzle a teaspoon of oil over each one. Season them to taste with sea salt and freshly cracked pepper. Place into the oven and cook for 7 minutes.

Combine the chicken, cumin, coriander, chili powder, oregano, roasted bell pepper, roasted poblano pepper, corn, spinach, tomato, minced garlic, green onions, cilantro, sour cream, and lime juice. Mix well until evenly coated. Taste then season with sea salt and freshly cracked pepper, to taste.

Carefully remove the mushrooms from the oven. Try not to spill the juice that has collected in the center of the mushroom. Spoon the chicken mixture into each mushroom cap (on top of any liquid that has collected in the mushroom). Sprinkle the top of each mushroom with a bit of shredded extra sharp cheddar cheese.

Place into the oven and bake for 10 minutes. Remove from the oven and serve immediately. Enjoy.

Tuesday, July 19, 2011

Lemon Poppy Seed Muffins

The kids wanted a treat for breakfast this morning so we decided to make these lemon poppy seed muffins I found at Brown Eyed Baker. They were super simple to make and smelled delicious while they were baking. My kids absolutely loved these muffins and devoured several for breakfast.

Lemon Poppy Seed Muffins:
Recipe and photos by For the Love of Cooking.net
Original recipe by Brown Eyed Baker
  • 2/3 cup of white sugar
  • Zest of one lemon, chopped
  • 2 cups of flour
  • 2 tsp baking powder
  • 1/4 tsp baking soda
  • 1/4 tsp salt
  • 3/4 cup of sour cream
  • Juice of one lemon
  • 2 eggs
  • 1 tsp vanilla extract
  • 1/2 cup of unsalted butter, softened
  • 2 tbsp poppy seeds
Preheat the oven to 400 degrees. Coat a muffin tray with cooking spray.

Rub the sugar with the chopped lemon zest together in a bowl with your fingertips until the sugar is moist and the lemon fragrance strong. Mix the flour, baking powder, baking soda, and salt together until well combined.

Beat the sour cream, lemon juice, eggs, vanilla extract, softened butter, and lemon sugar together in a bowl with a mixer until creamy and smooth. Slowly combine the flour mixture with the sour cream mixture. Add the poppy seeds and mix well.

Scoop the batter evenly into the muffin cups in the tray.

Place into the oven and cook for 16-18 minutes, or until a tester inserted in the center comes out clean. Let the muffins cool on a rack before serving. Enjoy.


Monday, July 18, 2011

Mediterranean Pizza

I needed to use up some ingredients in my refrigerator but I didn't feel like cooking so what's a girl to do? Make pizza. Using store bought dough and sauce makes this really feel like I am not cooking. I threw some leftover baby spinach, kalamata olives, black olives, sun dried tomato, feta cheese, red onions, and garlic on this pizza. It turned out delicious - my husband and I both really loved it and so did the kids.

Mediterranean Pizza:
Recipe and photos by For the Love of Cooking.net
  • Cooking spray
  • Corn meal
  • Pizza dough (store bought or homemade)
  • Pizza sauce
  • Mozzarella cheese
  • Baby spinach
  • Kalamata olives, sliced
  • Black olives, sliced
  • Sun dried tomato
  • Feta cheese
  • Red onion, sliced thinly
  • 1 clove of garlic minced
  • Dash of oregano
Preheat the oven to 425 degrees.

Spread dough on a pizza sheet that has been coated with cooking spray and a sprinkle of corn meal. Spoon the sauce on the dough and spread evenly. Sprinkle the mozzarella cheese all over followed by the spinach, kalamata olives, black olives, sun dried tomato, feta cheese, red onion, minced garlic, and dash of oregano.

Place pizza into the oven and bake for 15-20 minutes or until cheese is bubbling and the crust is golden brown. Remove from the oven then let cool for a few minutes. Slice and serve. Enjoy.


Click here for a printable version of this recipe - For the Love of Cooking.net